iDempiere setup under use of Eclipse Juno 4.2 on Windows 7
This tutorial describes how to set up the iDempiere project with Eclipse IEE 4.2 on a Windows 7 machine from scratch.
JAVA DOWNLOAD
Please make sure that you have installed Java JDK 1.6.0_35Update on your computer
and that you can find the jvm.dl file under this path:
Programme Files (x86) > Java > jdk1.6.0_22>bin>client>jvm.dll
If you cannot find it, please look up the following path:
Programme Files (x86) > Java >jdk1.6.0_22>jre>bin>client>jvm.dll
and copy it to the path before. This file is needed for the installation of Eclipse
ECLIPSE DOWNLOAD
Now you can download under Eclipse Downloads the Eclipse IDE for Java Developers.
And open Eclipse after being installed.
PLUGIN INSTALLATION IN ECLIPSE
For setting up iDempiere you need the following plugins
- buckminster core
- buckminster maven
- buckminster pde
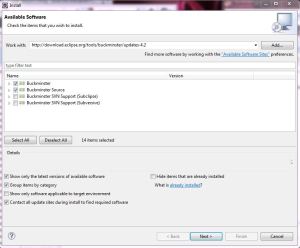
Go to Help > Install New Software and enter the following Link:
http://download.eclipse.org/tools/buckminster/updates-4.2
then select Buckminster and Buckminster Source –> Next
Next–> Click Next (Install Details Window) –> Next(Review Lizenses Window) –> I accept –> Next —> Finish
Now this timeline appears:
Then restart your Eclipse.
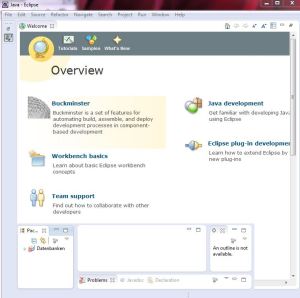
If Buckminster has been installed successfully, you Eclipse will look something like this:
INTEGRATING THE IDEMPIERE PROJECT VIA MECURIAL
Now download the source code here: http://bitbucket.org/idempiere/idempiere
via Mercurial, but please do NOT use the Mecurial plugin and clone the project, because problems may occur.
How to clone without plugin:
If you did’t use Mecurial before please download it: http://mercurial.selenic.com/
The Tool is called TortoiseHg 2.5.1 and includes Mecurial 2.3.2
Open a TortoiseHg workbench with a right click on the desktop –> hg Workbench
Then create an idempiere folder in your workspace folder
Open a terminal Window and go via cd to your Eclipse workspace\idempiere and type in
hg clone https://bitbucket.org/idempiere/idempiere –> Enter
now the repository will be downloaded in the idempiere directory under your workspace
This will take some minutes!
Here the window after successful download:
CREATING A TARGET PLATFORM
Now go back to Eclipse and click on File –> Switch Workspace –> Others and Browse for the idempiere directory in your workspace
Eclipse will restart.
Now go into the idempiere folder and create an empty “targetPlatform” folder there.
After that go to Eclipse: Window -> References -> Plug-in Development -> Target Platform
and click on Add and follow the next steps:
click on Add…
and type in iDempiere Target Platform
Click on Add…
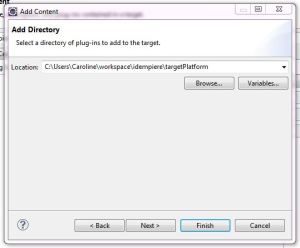
click on Directory –> Next and Browse for the targetplatform folder and click on Finish
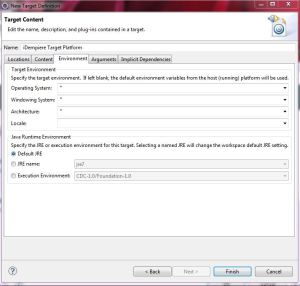
Do the following settings in the Environment and click Finish
Close Target Platform Window with OK.
Now ight click on the Project Explorer and select Import
Click on Buckminster ->Materialize…. -> Next
Now browse for:
C:\Users\<your name>\workspace\idempiere\org.adempiere.sdk-feature\adempiere.cquery
The process starts automaticaly
after that, click Finish and the p2 materializer process will start.
That takes a while!
After that the installing process will start automaticaly and will fill the Project Explorer with folders. Than Buckminster will build a workspace and in the end your eclipse


